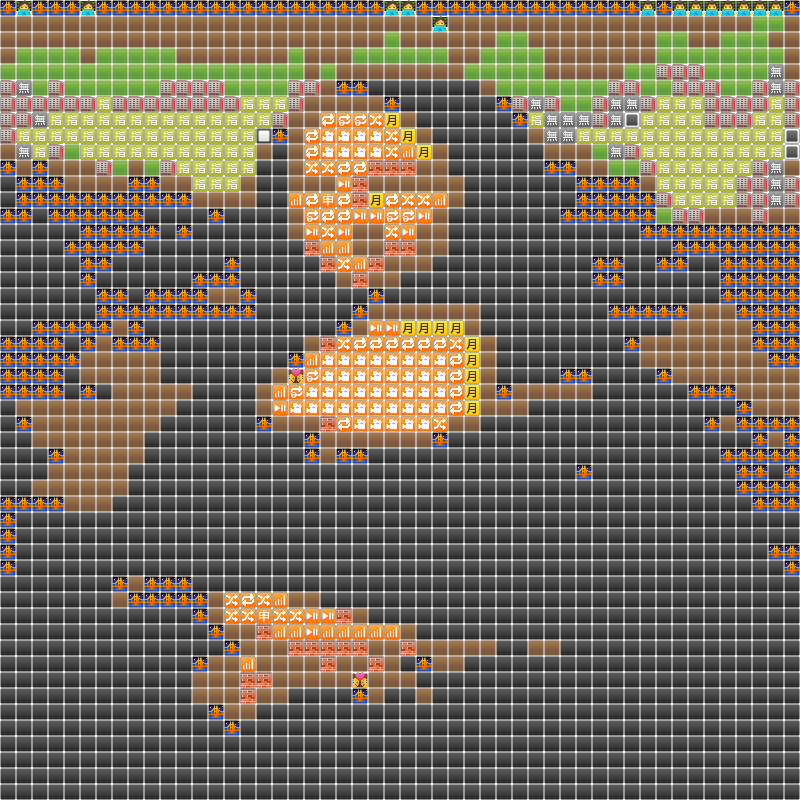
This is another project which I have created in Google Colab and you can create NFTs Adding Emojies to any Image using Python.
But First, We are going to make Ascii Art using Python. The Code will then convert the ascii output into Image. Which Can be used as another type of NFTs.
First we will clone my git to colab, to use it later.
#Get Emoji Library from Git
!git clone "https://github.com/joeldcosta/emoji-mosaic-mpl.git"
Download Image. I am using Mona Lisa image from wikipedia image souce, which will automatically rename it as Mona.jpg
#Download the Image
!wget "https://upload.wikimedia.org/wikipedia/commons/thumb/e/ec/Mona_Lisa%2C_by_Leonardo_da_Vinci%2C_from_C2RMF_retouched.jpg/1200px-Mona_Lisa%2C_by_Leonardo_da_Vinci%2C_from_C2RMF_retouched.jpg" -O "Mona.jpg"
Convert Image to Ascii Art
# Image to Ascii Art
import string
import matplotlib.pyplot as plt
import numpy as np
from PIL import Image
%matplotlib inline

#Image File
img_file = "Mona.jpg"

#open and resize
# Change the size
size = 60 #[HERE]
im = Image.open(img_file).resize([size, size])

#convert to greyscale
im2 = im.convert(mode = 'L')

#convert image to array (flattened) --> reshape
im4 = np.array(im2.getdata()).reshape([size, size])
print('Image loaded...')

#ASCII directory
#Variation 1
asci =  r"QG@#$%?*+^)/;:!,'.` "

#Variation 2
#asci = r"B8&WM#YXQO{}[]()I1i!pao;:,.    "

#get the proportion of 256 and replace with an ASCII charecter.
im7 = []
for i in range(size):
    imtemp = ""
    for j in range(size):
        imtemp+= asci[(len(asci)-1)*im4[i,j]//256]
    im7.append(imtemp)
print('Image Converted...')

#Ascii Saved in a text file
with open('Mona_ascii.txt', 'w') as text:
    for i in im7:
        text.write(i)
        text.write('\n')

print('Image written to .txt file.')
example1 = "/content/Mona_ascii.txt"
file1 = open(example1, "r")
print(file1.read())


>> Image loaded...
>> Image Converted...
>> Image written to .txt file.
***************??**********************???????????????*???*?
++++++++++++++++**++++++++++++++++++++++*****+****+++++++++*
++++++++++++++++*++++++++++++++++++++++++++++++++++++++++^++
+^^+^^+++^^+++++++++++++++^^^^^^++++++^^^++++++++^^^^^^^^^^+
^^^^^^^^^^^^^^^^^^^^^^^++^^^^^)^^^^^^^^^^^^^^^^^^^^^^^^^^^^+
^)^^^^^^^^^^^^^^^^^^^^^^^^^+****++^^^^^^^^^^^^^^^^^^))^^^))^
^)^)))^^)^^^^)))))))))))+?%%$##@##$?+)^)^^^^^^^)^))))))))))^
^)))))))))))))))))))))^?%%*?%$$#@@@G@*))))^^^)))))))))))))))
^))/))/))))))//))))//)??^)/)^+?$#@GGGG?))))))))))/))))))))/)
^)))))//////////////)?*/:!!!:;)*$#@GGGG*/)))/////////))))//)
^///)////;//////////*#^;:::!:;)+?$@@GGG@^))))///////////)//)
+))))^//;;/;;//;//;^$$);:::::;/)^*$@GGGQ%+++^)))////////)//)
?++*++^)))^))/;;;;/?#%//;::;))))^*$@GGGG#??*++^+)///;;/))))+
$???++++*+**++/;;;^%#$*+*);**+?%%?%@@GGG@%%?****+/;;;;/))^)+
$%****+***??**))+^^$@%))^//+)/^^)^%@@GGG@%%%????*);;///)^^)^
%???***?????%%?????$@%;:;;;)/::;)+$@@@GG@%??*????+)//)))^^^^
??$%???????%%%%%%$$#@#);;;;^/;;/+?#@@@@G@$%??***++^^^++++++*
%%$$?%??????%%%%%$##@@*)//*?^;)^*%#@@@@G@#$$$%%%%????*???%??
#$$$%%%%?%?%%%%%%$###@%^)/+*+^)^*%@@@@@G@@$%%%%%%%%??*?%%%?*
$$$%%%%%%%%%%%%%%%$#@@@?)/)^+^^*%$@@@@GG@#%%%%%%%%??%%%??%??
##$$$%%%%%%%%%%???%#@@@@$);/^*?%$#@@@@GG@@$%%??%%%?%%%???%??
##$$$$%%%%$%%%??**?#@@@@@#%%%$$####@@@@G@@#%%%?%%%%%$%?????%
##$$#$$%?????**++**$@@@@@@#??$$$$%%$@@GG@G#%%%?%%%%%%%%%%?*?
#$$$$%%??????*****?$@@@@@@#+)+***+*?#@G@@G@$%???*****+*???*?
$%?????**?%%%$%%%%$#@@@@#$?^)))))))+%####@G@###$%$%++***?%??
%%%?%%???%%?%###$$#@@@#$*);;;;;;;;/)?#$$#@@@#$%?*++^+***????
%%%%$%??????%#$##$@@@#$^;:::::::::;)?$$$#@@@@#$?^^^+++****??
?%?%?%*****%%$%$$#@@#$+;:!!!!:!!::;)?$$$@@#$#@@$?*+^++++++??
%%%%%$?*+++*%%?$@@@#?+/:!!!!!!!!::;^?$$$$%??%$@@#%?*+^^))^+*
%???%%%$%*+**?$@@@@$);:!!!!!,!!!!:;^?%?*+++?%$@@@@#$%%%*+^^^
$????%????**+?@@@@@%^:!!!!!,,,,,,!;^***?%$#@@GGG@@@#$$$%*^^+
$%???****++*$@@@@@$%?+^//:!,,,,!!/^*%$#@@@@@GGGG@@@@#%%%%%?*
#$%?***?**?#@#@##$%%%%%?*++^))))+?%$@@@@####@GGGG@@@#$%%%??%
$##%?******######$$$#$$?????????%$#@G@@#$###@@@@G@@@@#$$$%%%
$#@$%%?%%%$##@@@#$####$%??%%%%%$#@GG@@####$%%$$#@@@@@#%??%%%
$$#??**?*?$##@@@###@##$$$$$$$%$#@@G@@@@@##%%%$#@G@@@@##$%$$%
$$?++++^^?####@@#####@#####$$$#@@@@@@@@@$$%$$@GGG@@####%??%%
?%?****+?#########@##@####$$$##@GG@G@@@#$###GGGG@@@####$????
%$$$%%%$##@##$#@@@@@@@@####$###@@GGGGG@#@@GGG@GG@@@@@@####$$
%$%%%$######$$$#@@@@@@@@#####@@@@@GGGG@@GGGGGGGGGG@@@@###$$%
%$$$######$$$$##@@@@@@@@#$$#@@@@@@GGGG@GGGG@@GGGGG@@#@###$$%
%$$#######@@#@@@@@G@@@@@###@@@@@@GGGG@GGGGG@@@@GGG@@@@@##$%%
%$####@##$$$$#@@@@G@@G@@@@@@@@@GGGGGGGGGGGGGGG@GGGG@@@@@#$%%
%$@##@#$$%%%%%$#@@@@@@@@@@@@@GGGGGGGGGGGGGGGGGGGGGGG@@@@@#$%
%#@##@#$%??%%%?%?^))^*%#@GGGGGGGGGGGGGGGGGGG@@GGGGG@@@@@@@#$
$#@@@@#$%$%%$%$?);:;;//)^*$@GGGGGGGGGGGGGGGG@@GGGGG@@@@@@##$
$#@@@@@##$$#$$$?^)/)//////)+?$@GGGQQQGGGGQGGGGGGG@@@@@@@###$
$@@@@@G@@@@####$?**+^))/))))/)*$@G@#@@#$$##@GGGGG@$@@@@@@#@#
$#GGGGGGG@G@@@@@#$?*+^^)^))+?^)+???*%%%%%%$##@GGG@#@@@@@@@##
#@@@GGGGGGGGGG#?*^)+**++^^+^+%%???%$$$%$$$$###GGGGGGGG@@@@#$
@@G@GGGGGGGGG@??+^))+??**^^?*+?$$$$$##$%#@#@@@GGQQGGGG@G@@#$
@GGG@GGG@@GGG#?**+))+*%%?%*+?%??$##@@@@#@@@@GGGQQQQGGGG@@@#$
@GGGGGGGGGG@@#%??+^*%$$##$$$$$#$%@@G@GGGGGGGGGQQQQGGGGG@@@##
@GGGGGGGGGGG@@#$?+?########$#@@@@GGGGQQQGGGQQQQQQQGGGGG@@@@@
@GGGG@GGGGGGGGG@$%#@@@@@@###@@@GGGGGGGQQQQQQQQQQQQGGGGGG@@@@
GGGGGGGGGGGGGGG@@#@@G@@@@@@@GGGGGGGGQQQQQQQQQQQQQQQGGGGGGG@@
GGGGGGGGGGGGGGGGGGGGGGGGGGGGQQQQQQQQQQQQQQQQQQQQQQQQGGGGGGG@
GGGGGGGGGGGGGGGGGGGGGGGGGGQGQQQQQQQQQQQQQQQQQQQQQQQQGGGGGGGG
GGGGGGGGGGGGGGGGGGQGGGGGGQGGQQQQQQQQQQQQQQQQQQQQQQQQQQGGGGGG
GGGGGGGGGGGGGGGGGGGGGGGGGGGGGGQQQGGGGGQGQQQQQQQQQQQQQQQQQGGG
Now, We will Convert Our output text to Image
from math import ceil

from PIL import (
    Image,
    ImageFont,
    ImageDraw,
)

PIL_GRAYSCALE = 'L'
PIL_WIDTH_INDEX = 0
PIL_HEIGHT_INDEX = 1
COMMON_MONO_FONT_FILENAMES = [
    'DejaVuSansMono.ttf',  # Linux
    'Consolas Mono.ttf',   # MacOS, I think
    'Consola.ttf',         # Windows, I think
]

in_put = "/content/Mona_ascii.txt"
out_put = "Mona_text_img.png"

def main():
    image = textfile_to_image(in_put)
    image.show()
    image.save(out_put)

def textfile_to_image(textfile_path):
    """Convert text file to a grayscale image.

    arguments:
    textfile_path - the content of this file will be converted to an image
    font_path - path to a font file (for example impact.ttf)
    """
    # parse the file into lines stripped of whitespace on the right side
    with open(textfile_path) as f:
        lines = tuple(line.rstrip() for line in f.readlines())

    # choose a font (you can see more detail in the linked library on github)
    font = None
    large_font = 20  # get better resolution with larger size
    for font_filename in COMMON_MONO_FONT_FILENAMES:
        try:
            font = ImageFont.truetype(font_filename, size=large_font)
            print(f'Using font "{font_filename}".')
            break
        except IOError:
            print(f'Could not load font "{font_filename}".')
    if font is None:
        font = ImageFont.load_default()
        print('Using default font.')

    # make a sufficiently sized background image based on the combination of font and lines
    font_points_to_pixels = lambda pt: round(pt * 96.0 / 72)
    margin_pixels = 20

    # height of the background image
    tallest_line = max(lines, key=lambda line: font.getsize(line)[PIL_HEIGHT_INDEX])
    max_line_height = font_points_to_pixels(font.getsize(tallest_line)[PIL_HEIGHT_INDEX])
    realistic_line_height = max_line_height * 0.8  # apparently it measures a lot of space above visible content
    image_height = int(ceil(realistic_line_height * len(lines) + 2 * margin_pixels))

    # width of the background image
    widest_line = max(lines, key=lambda s: font.getsize(s)[PIL_WIDTH_INDEX])
    max_line_width = font_points_to_pixels(font.getsize(widest_line)[PIL_WIDTH_INDEX])
    image_width = int(ceil(max_line_width + (2 * margin_pixels)))

    # draw the background
    background_color = 255  # white
    image = Image.new(PIL_GRAYSCALE, (image_width, image_height), color=background_color)
    draw = ImageDraw.Draw(image)

    # draw each line of text
    font_color = 0  # black
    horizontal_position = margin_pixels
    for i, line in enumerate(lines):
        vertical_position = int(round(margin_pixels + (i * realistic_line_height)))
        draw.text((horizontal_position, vertical_position), line, fill=font_color, font=font)

    return image

if __name__ == '__main__':
    main()
print("Your File name is ",out_put, "[Save / Download]")
from IPython.display import Image
Image(out_put)
Convert Image to Emoji Mosaic Art
#imports import numpy as np import matplotlib.pyplot as plt import matplotlib.image as mim import matplotlib.pyplot as plt from scipy import spatial from matplotlib import cm from PIL import Image #Image File img_file = "Mona.jpg" #emoji directory################################################### # Note:- Using Emoji_16.npy (Variation 1) ## Uncomment this two lines or... emoji_array = np.load("/content/emoji-mosaic-mpl/emojis_16.npy") size = 100 # Note:- Using Emoji_matches.npy (Variation 2) ## Uncomment this two lines!!! #emoji_array = np.load("/content/emoji-mosaic-mpl/emoji_matches.npy") #size = 100 # Change size according to your convinence 16, 100, 200, 500... etc etc ################################################################### #get mean of each emoji emoji_mean_array = np.array([ar.mean(axis=(0,1)) for ar in emoji_array]) #store them in a tree to search faster tree = spatial.KDTree(emoji_mean_array) #--> open #--> resize, smaller #--> convert to an array #--> reshape to a 3d array #--> normalize the pixel values G_sm = np.array(Image.open(img_file).resize([size,size]).getdata()).reshape([size,size,3])/256 plt.figure() plt.imshow(G_sm) plt.title('Original Image') indices = [] #flatten the array flattened_img = G_sm.reshape(-1, G_sm.shape[-1]) #match the pixels with the closest resembling emoji #tree.query() finds the nearest neighbour index for pixel in flattened_img: pixel_ = np.concatenate((pixel, [1])) _, index=tree.query(pixel_) indices.append(index) #from index get the corresponding emoji (flattened) emoji_matches = emoji_array[indices] #reshape it to form the image. each emoji has the shape (16, 16, 4) #note: 4 --> R, G, B, alpha dim = G_sm.shape[0] resized_ar = emoji_matches.reshape((dim, dim, 16, 16, 4 )) #converts individual emoji patches (5 dimensional) #into a complete image (3 dimensional) using numpy blocks final_img = np.block([[[x] for x in row] for row in resized_ar]) #Plot Image with Data plt.figure() plt.imshow(final_img) plt.title('Emoji mosaic') plt.savefig('plot_emojied.png') # NFT Image nft = 'NFT_1.png' plt.imsave(nft,final_img) print("Your NFT is Saved & Ready to Use") print("Your NFT File Name is : ", nft)
*This will give you the output as Preview of Original Image and Plotted Image + Create Ready to use NFT as NFT_1.png which you noticed at the beginning of this tutorial.
And Finally You can download your Image and use it on Opensea or You can twick this code or just experiment with it. You can change the ascii script and try with this variation asci="░▒▓█▄▀■".


Comments
Post a Comment